[How To WhaTap] Building User-Specific Monitoring Dashboards
 WhaTap TeamAI-Native Observability Platform
Why User-Specific Monitoring Dashboards Matter
“Which screen am I supposed to look at?”
Monitoring tools start out with a wide range of menus—and over time, even more presets are added.
The problem is simple: everyone sees the same menus, regardless of their role.
- DBAs focus on analysis and performance trends
- Operations teams rely on real-time dashboards and alerts
- Developers spend most of their time on traces and error analysis
- External partners should only see limited views
- New hires should start with just the essentials
As a result, the same question keeps coming up: “Which one of these should I actually use?”
The Solution: Group Menus and Dashboards by User Role
WhaTap solves this with User Group–Based Display Settings.
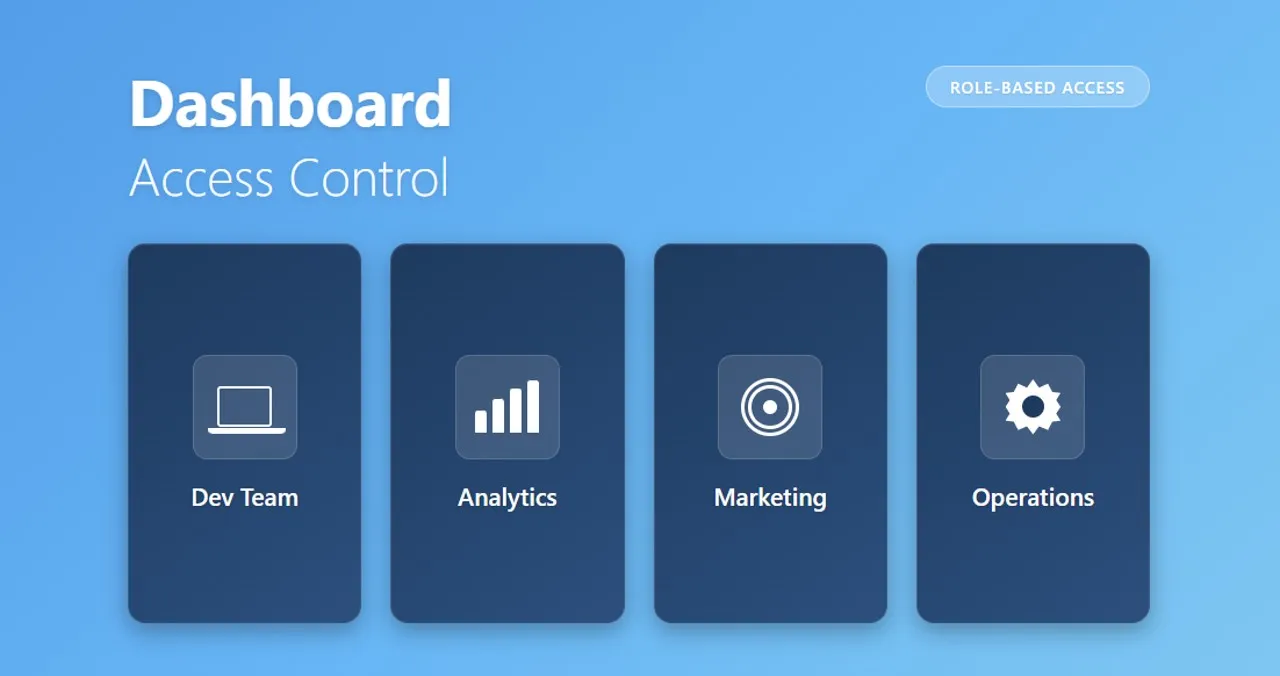
WhaTap provides a wide range of built-in menus and dashboards. These can be grouped and selectively exposed by user group, so each group only sees what’s relevant to them.
The concept is straightforward:
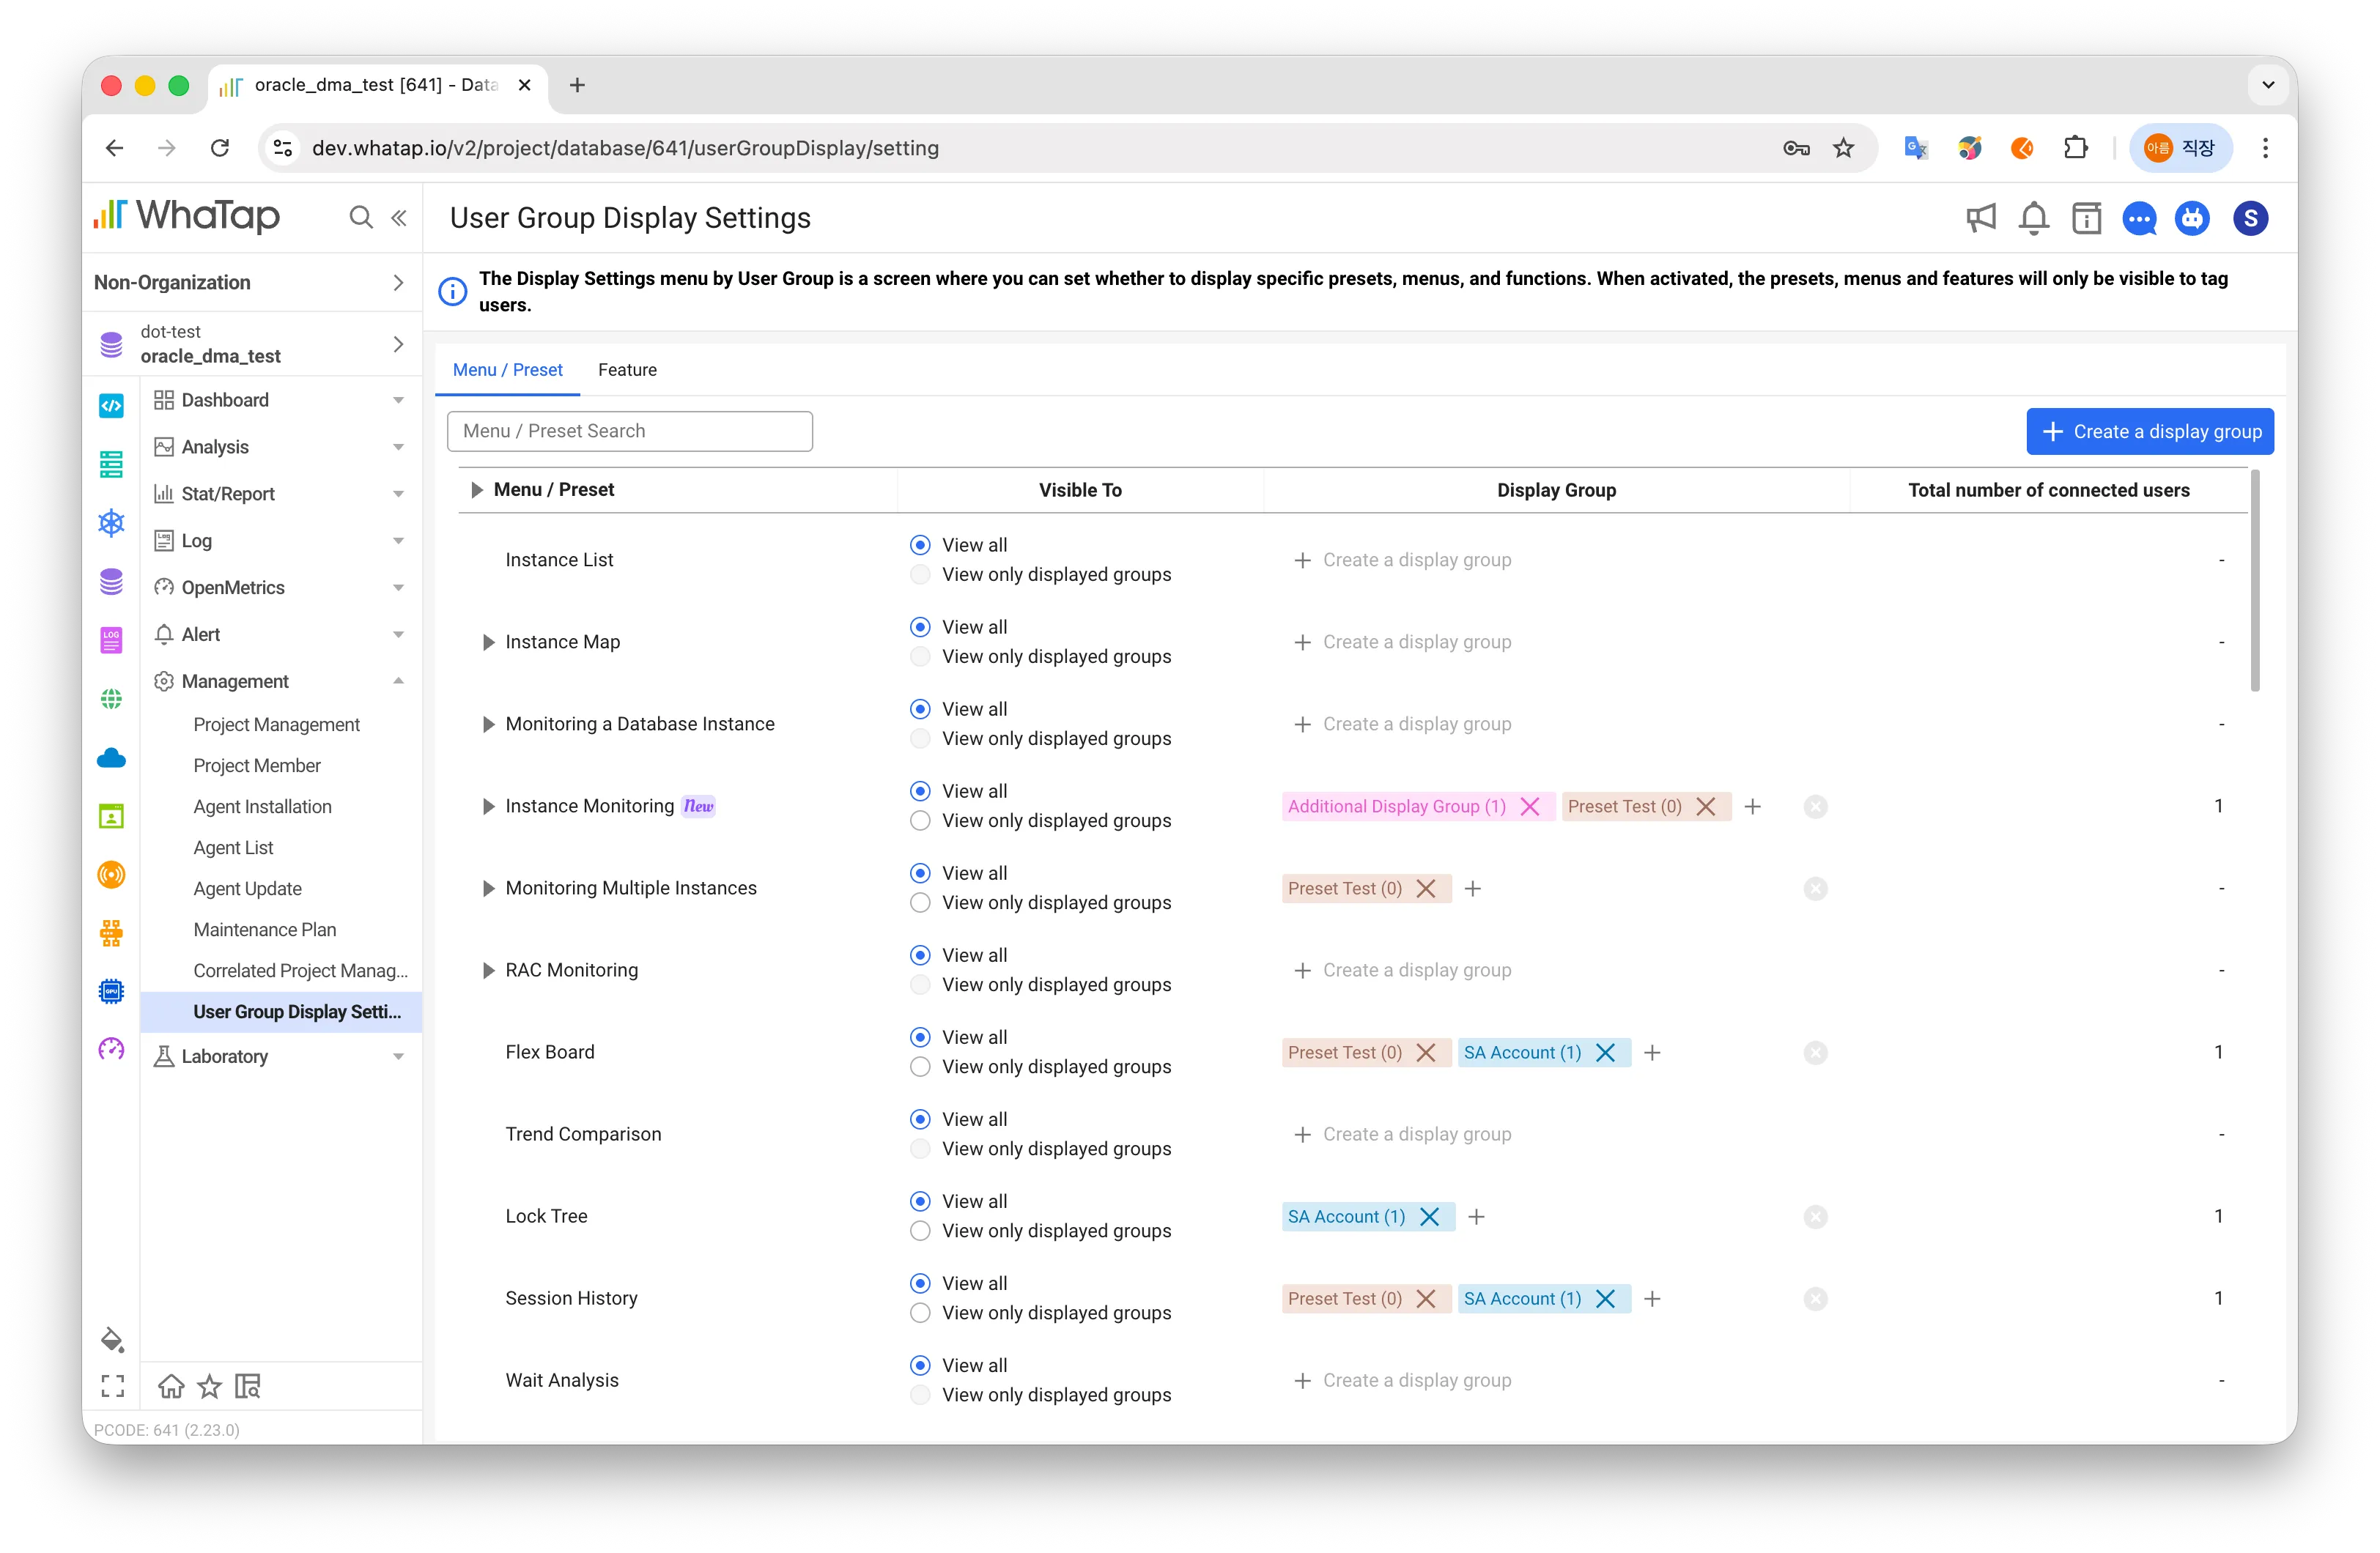
- An administrator creates a Display Group
- Specific users are added to that group
- Each menu is configured to be visible only to selected groups
When “Show only to selected groups” is enabled, users outside the group won’t see the menu at all. If the setting is disabled, the menu is visible to everyone regardless of group membership.
When Is This Useful?
1. Clear Separation by Team Role
Different teams need different information.
- DBAs focus on performance trends, resource analysis, and slow queries
- Developers rely on transaction maps and error tracing
- Operations teams prioritize real-time alerts and incident dashboards
By organizing display groups by team, users see only the menus relevant to their role when they log in—reducing noise and improving productivity.
2. Access Control for Sensitive Information
Not all monitoring data should be visible to everyone.
Certain analysis views or audit logs should only be accessible to authorized users. With display groups, users outside the group won’t even know those menus exist—no need to create separate projects just to manage access.
3. Secure Access for External Partners
SI partners or external consultants often need monitoring access—but not to internal-only dashboards.
By creating a dedicated display group for external users and linking only approved menus, you can safely share what’s needed while keeping internal data protected.
4. Smoother Onboarding for New Hires
Showing dozens of menus to a new team member can be overwhelming.
Instead, start with a small set of core dashboards and gradually expand access as they become familiar with the system. This significantly improves the onboarding experience.
5. Control Over Sensitive Database Actions
Database monitoring includes actions that can directly affect live systems.
Examples include:
- Terminating long-running sessions (Kill Session)
- Capturing session execution traces
- Bulk resolving in-progress events
These actions should never be available to everyone.
With display groups, you can restrict:
- Kill Session → DBAs only
- Bulk event resolution → Operations team leads
This ensures both safety and accountability.
How to Configure User Group–Based Dashboards
The setup process is intuitive.
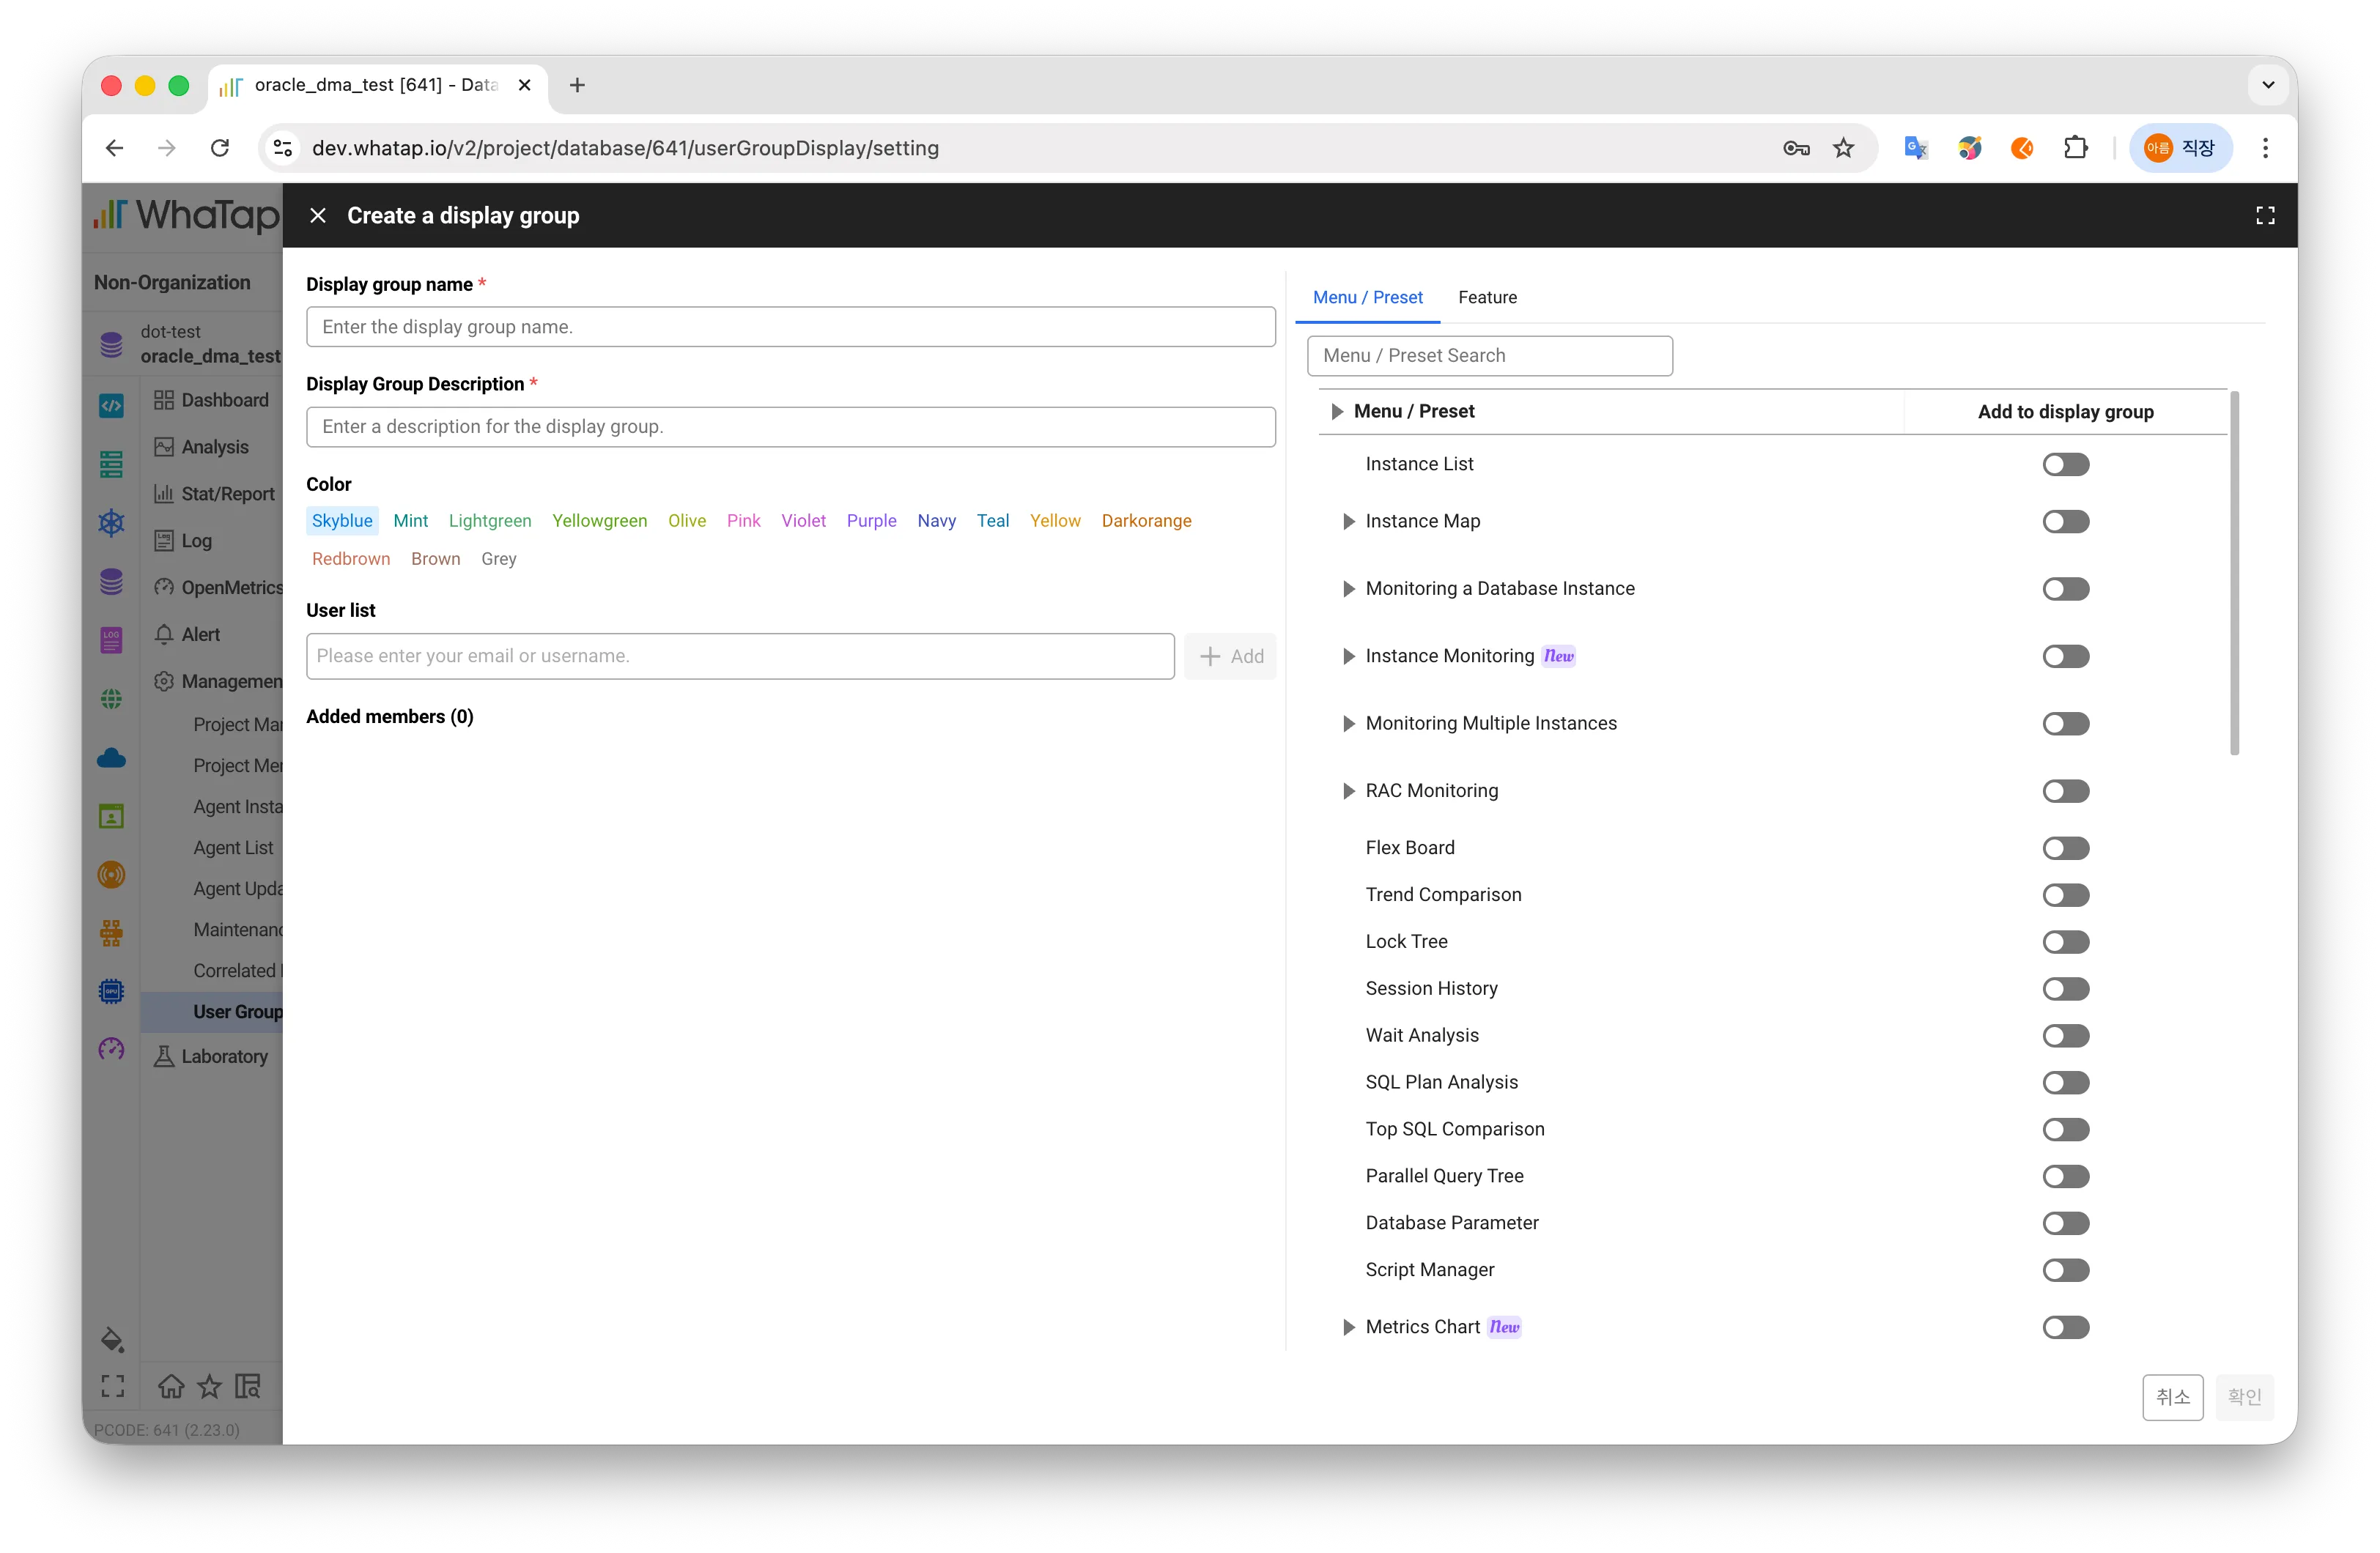
- Go to Admin > User Group Display Settings
- Click Create Display Group
- Name the group and add members by email or username
- Select the menus and presets the group can access
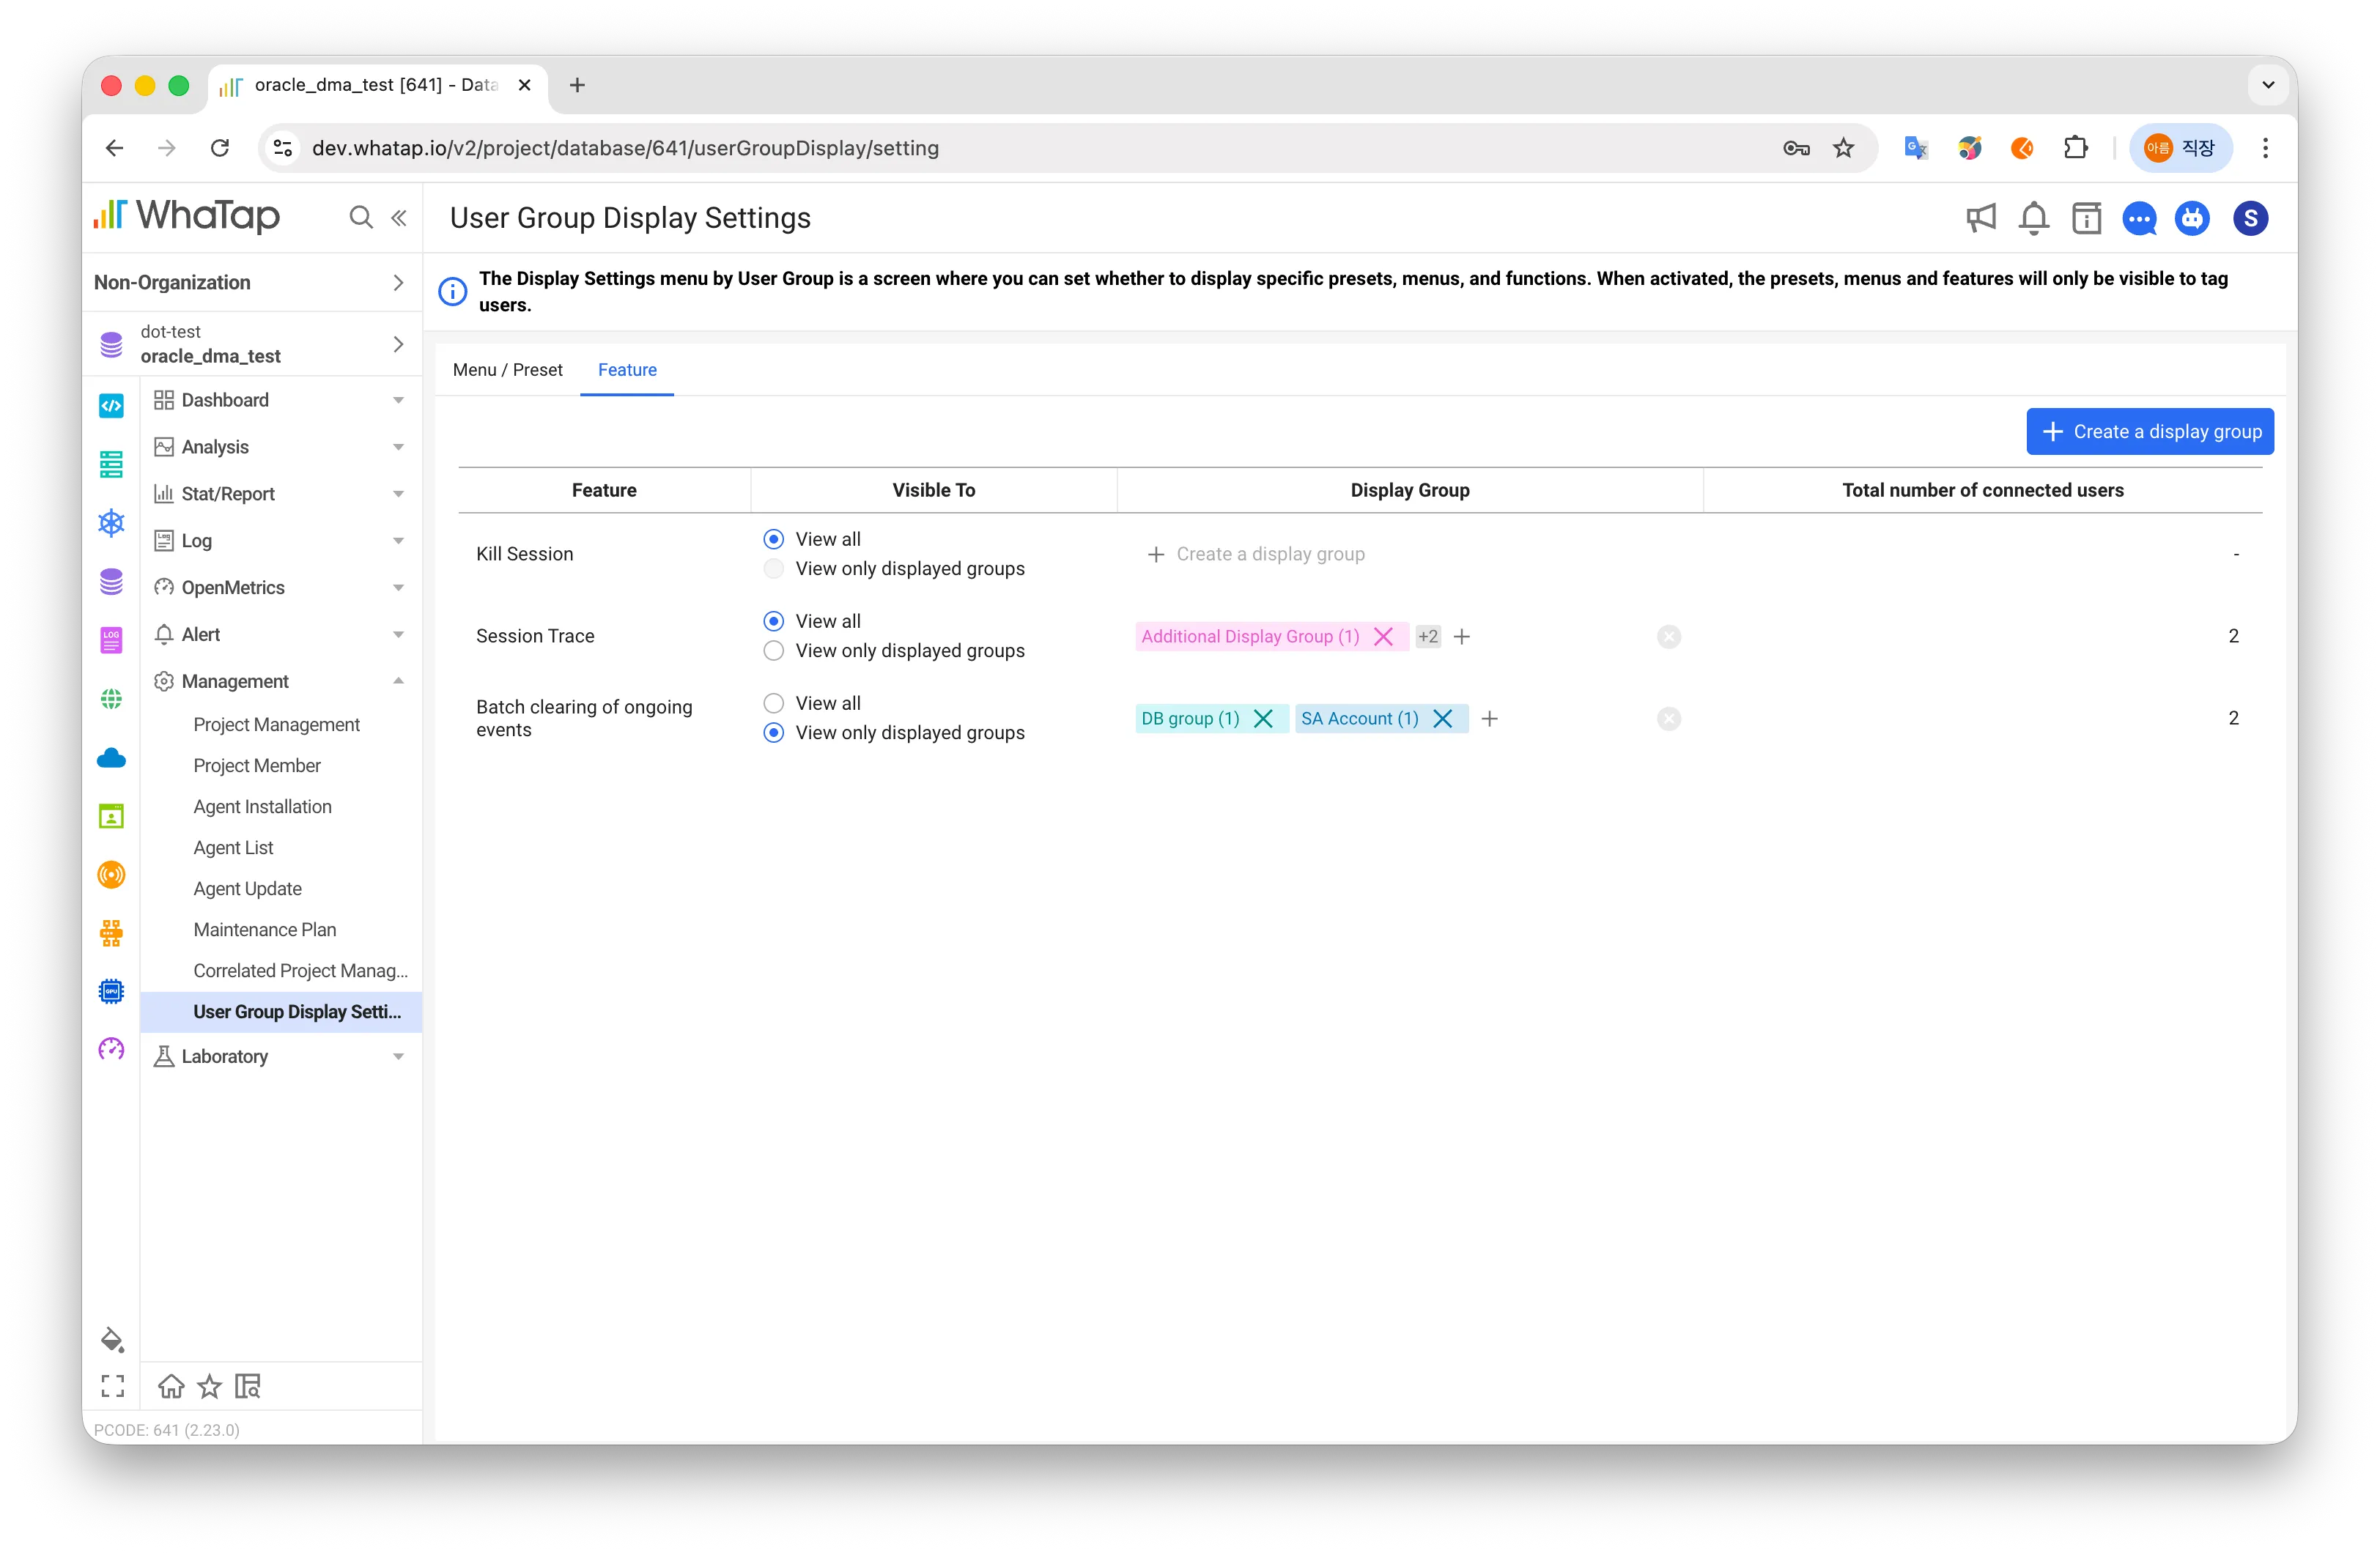
Once the group is created, review each menu’s visibility setting.
- Default: Visible to all users
- To restrict access: switch to Visible only to selected groups
Changes take effect immediately. Menus disappear entirely for users who are not part of the group.
For database monitoring, you can also configure feature-level permissions—such as Kill Session or Session Trace—under the feature settings tab.
Once the group is created, review each menu’s visibility setting.
- Default: Visible to all users
- To restrict access: switch to Visible only to selected groups
Changes take effect immediately. Menus disappear entirely for users who are not part of the group.
For database monitoring, you can also configure feature-level permissions—such as Kill Session or Session Trace—under the feature settings tab.
Final Thoughts
As organizations and systems scale, the principle of
“the right information for the right people” becomes critical.
Showing every menu to every user may seem convenient at first, but over time it leads to confusion, inefficiency, and security risk.
With WhaTap’s user group–based display settings, you can deliver role-specific dashboards within a single project—helping users stay focused while enabling administrators to protect sensitive data.
Experience user-specific monitoring dashboards and access control with WhaTap.